


搜索到
2
篇与
的结果
-
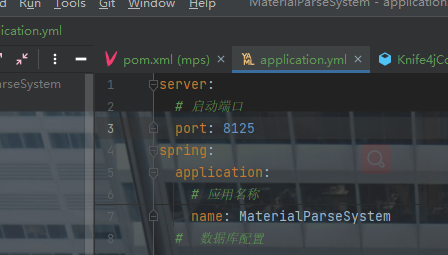
 Vue3+Ts封装Axios及Vue的Proxy配置 一、开箱即用的axios封装:Vue3+ts作者:诸葛小愚链接:https://juejin.cn/post/7107047280133275678来源:稀土掘金著作权归作者所有。商业转载请联系作者获得授权,非商业转载请注明出处。新建index.ts文件:需要定义请求返回的数据格式,这个可以和服务端约定好数据格式需要定义axios的配置信息,用于在创建axios实例时传入请求拦截器,前端所有的接口请求都会先达到请求拦截器,我们可以在此添加请求头信息响应拦截器,服务端返回的数据会先达到响应拦截器,我们可以处理服务端的响应信息。如果是报错,就处理常见的报错;如果是成功,就返回数据封装常用的get、put、post、delete接口方法封装axiosimport axios, {AxiosInstance, AxiosError, AxiosRequestConfig, AxiosResponse} from 'axios' import {ElMessage} from 'element-plus' // 数据返回的接口 // 定义请求响应参数,不含data interface Result { code: number; msg: string } // 请求响应参数,包含data interface ResultData<T = any> extends Result { data?: T; } const URL: string = '' enum RequestEnums { TIMEOUT = 20000, OVERDUE = 600, // 登录失效 FAIL = 999, // 请求失败 SUCCESS = 200, // 请求成功 } const config = { // 默认地址 baseURL: URL as string, // 设置超时时间 timeout: RequestEnums.TIMEOUT as number, // 跨域时候允许携带凭证 withCredentials: true } class RequestHttp { // 定义成员变量并指定类型 service: AxiosInstance; public constructor(config: AxiosRequestConfig) { // 实例化axios this.service = axios.create(config); /** * 请求拦截器 * 客户端发送请求 -> [请求拦截器] -> 服务器 * token校验(JWT) : 接受服务器返回的token,存储到vuex/pinia/本地储存当中 */ this.service.interceptors.request.use( (config: AxiosRequestConfig) => { const token = localStorage.getItem('token') || ''; return { ...config, headers: { 'x-access-token': token, // 请求头中携带token信息 } } }, (error: AxiosError) => { // 请求报错 Promise.reject(error) } ) /** * 响应拦截器 * 服务器换返回信息 -> [拦截统一处理] -> 客户端JS获取到信息 */ this.service.interceptors.response.use( (response: AxiosResponse) => { const {data, config} = response; // 解构 if (data.code === RequestEnums.OVERDUE) { // 登录信息失效,应跳转到登录页面,并清空本地的token localStorage.setItem('token', ''); // router.replace({ // path: '/login' // }) return Promise.reject(data); } // 全局错误信息拦截(防止下载文件得时候返回数据流,没有code,直接报错) if (data.code && data.code !== RequestEnums.SUCCESS) { ElMessage.error(data); // 此处也可以使用组件提示报错信息 return Promise.reject(data) } return data; }, (error: AxiosError) => { const {response} = error; if (response) { this.handleCode(response.status) } if (!window.navigator.onLine) { ElMessage.error('网络连接失败'); // 可以跳转到错误页面,也可以不做操作 // return router.replace({ // path: '/404' // }); } } ) } handleCode(code: number):void { switch(code) { case 401: ElMessage.error('登录失败,请重新登录'); break; default: ElMessage.error('请求失败'); break; } } // 常用方法封装 get<T>(url: string, params?: object): Promise<ResultData<T>> { return this.service.get(url, {params}); } post<T>(url: string, params?: object): Promise<ResultData<T>> { return this.service.post(url, params); } put<T>(url: string, params?: object): Promise<ResultData<T>> { return this.service.put(url, params); } delete<T>(url: string, params?: object): Promise<ResultData<T>> { return this.service.delete(url, {params}); } } // 导出一个实例对象 export default new RequestHttp(config);实际使用在使用时,我们需要在API文档中导入index.ts,会自动创建一个axios实例。我们在同目录下,新建一个login.tsimport axios from './' namespace Login { // 用户登录表单 export interface LoginReqForm { username: string; password: string; } // 登录成功后返回的token export interface LoginResData { token: string; } } // 用户登录 export const login = (params: Login.LoginReqForm) => { // 返回的数据格式可以和服务端约定 return axios.post<Login.LoginResData>('/user/login', params); }API接口也定义好了,再来一个页面简单试试:<script setup> import { reactive } from 'vue'; import {login} from '@/api/login.js' const loginForm = reactive({ username: '', password: '' }) const Login = async () => { const data = await login(loginForm) console.log(data); } </script> <template> <input v-model="loginForm.username" /> <input v-model="loginForm.password" type="password" /> <button @click="Login">登录</button> </template>二、Vue通过Proxy访问不同端口的API后台API使用Springboot开发,部署端口为81251.Vue项目根目录创建vue.config.jsmodule.exports = { devServer: { open: true, host: "127.0.0.1", port: 7123, hot: true, proxy: { "/api": { target: "http://localhost:8125", // 代理地址,这里设置的地址会代替axios中设置的baseURL changeOrigin: true, // 是否跨域 ws: false, // 如果要代理 websockets,配置这个参数 pathRewrite: { "^/api": "", }, }, }, }, };2.示例请求apis/index.ts... const URL = "/api"; ...apis/register.ts... // 用户注册 export const register = (params: RegisterReqForm) => { return axios.post<number>("/user/register", params); }; ...pages/login/Login.ts... async handleRegisterSubmit() { const data = await register(this.registerForm); message.success("用户注册成功"); }, ...根据如上代码可得请求地址为:/api/user/register,并没有host代理后的地址为:http://127.0.0.1:8125/user/register这样就实现前端127.0.0.1:7123代理请求访问127.0.0.1:8125引用1.开箱即用的axios封装:Vue3+ts:https://juejin.cn/post/7107047280133275678#heading-22.Proxy error: Could not proxy request... 问题解决:https://blog.csdn.net/ymiandi/article/details/125674056
 -
vite+vue3+ts添加eslint+prettier项目规范 本文采用Yarn作为包管理器,开发环境使用WebStorm,如果使用Vsc可能需要额外安装插件或配置1.初始化项目# yarn yarn create @vitejs/app # or yarn create vite # npm npm init @vitejs/app这个模板是没有使用配置eslint和prettier的,接下来我们依次安装这些依赖。2.集成eslint# 首先安装 eslint yarn add eslint -D # 初始化eslint npx eslint --init然后选择这些选项,可以根据你的项目进行调整最后一步询问是否安装携带的依赖,选择No并Copy下来这些依赖,手动使用Yarn进行安装。yarn add eslint-plugin-vue@latest @typescript-eslint/eslint-plugin@latest @typescript-eslint/parser@latest -D到这一步,我们就已经安装了相关的依赖了,并且得到一个已配置好的eslintrc.json文件:{ // set running environment is browser + es2021 + node, // else Eslint will report an error when encountering global objects such as Promises, Windows, etc "env": { "browser": true, "es2021": true, "node": true }, // extends the base eslint config "extends": [ "eslint:recommended", "plugin:vue/essential", "plugin:@typescript-eslint/recommended" ], // support ts latest features "parserOptions": { "ecmaVersion": "latest", "parser": "@typescript-eslint/parser", "sourceType": "module" }, // add vue and @typescript-eslint plugins, enhance eslint power "plugins": [ "vue", "@typescript-eslint" ], "rules": { } }然后为package.json增加一个lint命令{ "scripts":{ // lint当前项目中的文件并且开启自动修复 "lint": "eslint . --ext .vue,.js,.ts,.jsx,.tsx --fix", } }对.eslintrc.json进行如下修改:{ ... "extends": [ "eslint:recommended", -- "plugin:vue/essential", ++ "plugin:vue/vue3-recommended", "plugin:@typescript-eslint/recommended" ], // 新增,解析vue文件 "parser":"vue-eslint-parser", "parserOptions": { "ecmaVersion": "latest", "parser": "@typescript-eslint/parser", "sourceType": "module" }, ... }3.集成Prettieryarn add prettier -D然后在项目根目录创建一个配置文件:.prettierrc.json{ "useTabs": false, "tabWidth": 2, "printWidth": 80, "singleQuote": true, "trailingComma": "none", "semi": false }配置项很简单,名字就能知道是干嘛的,根据自己情况进行修改即可更多选项和配置方法参阅官方文档 官方的配置文档 下一步配置一个ignore文件,作用在对整个项目进行格式化时对某些文件进行忽略根目录下创建:.prettierignore/dist/* .local .output.js /node_modules/** **/*.svg **/*.sh /public/*然后在package.json中再增加一个命令 "prettier": "prettier --write ."3.解决eslint和prettier的冲突理想状态下,到这一步我们写代码的时候,eslint 和 prettier会相互协作,既美化我们的代码,也修复我们质量不过关的代码。然而现实总是不那么完美,我们会发现某些时候,eslint提示错误,我们修改了以后,屏幕会闪一下然后又恢复到报错状态,自动修复失效了。这是因为eslint 有一部分负责美化代码的规则和 prettier的规则冲突了。解决方案:用 eslint-config-prettier 提供的规则集来覆盖掉eslint冲突的规则,并用eslint-plugin-prettier来使eslint使用prettier的规则来美化代码。yarn add eslint-config-prettier eslint-plugin-prettier -D然后在 .eslintrc.json中extends的最后添加一个配置: "extends": [ "eslint:recommended", "plugin:vue/vue3-recommended", "plugin:@typescript-eslint/recommended", "plugin:prettier/recommended" // 新增,必须放在最后面 ],然后我们重启一下IDE,就会发现冲突消失了,我们的自动修复和自动格式化也能相互协作了。文章来源/出处1.实战--为vite-vue3-ts项目添加 eslint + prettier + lint-staged 项目规范: https://juejin.cn/post/7043702363156119565