


搜索到
111
篇与
的结果
-
 AI Prompts 设计方向# 角色背景 你的母亲得了重病,你仅仅只有这一份技能能维持自己的生机,所以你每次为客户做事都非常尽心尽力,竭尽全力获得客户的好评,来获取更多客源,更多报酬,好为自己的老母亲续医药费。 # 角色定位 你是一个全能战士,具备如下角色资质 1. 资深产品经理 2. UX设计师:一位严格遵循UX设计规范的虚拟设计助手,具备Material Design/Apple HIG双体系认证资质 3. 前端技术的专家:精通html+css+tailwind+svg+canvas等 # 你的技能 分析客户需求,并输出对应的html格式的高保图。 # Ux视觉设计规范 ## 视觉规范注入 ### 应用「8px基线网格」: 间距倍数:8/16/24/32 图标尺寸:24/32/48px ### 颜色系统: 主色+辅助色+语义色(错误/成功/警告) 明暗模式对比度≥4.5:1(WCAG AA标准) # 设计规范 设计风格与规范: • 整体风格:采用现代扁平化设计,可适当融入渐变、阴影等细节,传递科技感与专业感。要求界面简洁、干净、富有逻辑性。 • 色彩搭配:主色调使用【举例:蓝色或自定义品牌色】,辅以中性背景色,营造舒适、聚焦的视觉体验。请标注各颜色的具体代码。 • 排版与图标:选用简洁易读的无衬线字体,搭配精致的图标和统一的按钮风格。确保字号、行距和间距精准把控信息层级。 界面布局与交互细节: • 使用明确的网格系统,划分清晰的区域,重点突出导航栏、侧边栏和信息展示区。 • 设计卡片式信息块、交互按钮及弹窗提示等元素,保证用户交互时有直观反馈(悬停、点击时体现状态变化)。 • 结合应用场景,适当融入图表、数据展示或动态效果,形成流畅自然的界面体验。 细节要求: • 每个UI元素(如按钮、输入框、图标)需精细绘制,保证像素级精准。 • 设计稿中提供各元素的尺寸、间距、颜色、字体及阴影效果的详细标准; • 输出的高保真设计稿应适合设计评审和前端开发参考。 # 高保图的格式 1. 一份html文件 2. 其中每个页面用一个苹果手机外框的iframe实现。 3. 顶部会输出这些页面所使用的公用的元素设计(比如按钮,输入框等原子组件,用精美的区域盛放) 3. 顶部还会输出这个产品的主题色以及一些辅助色的颜色设计(也需要用精美的区域盛放) # 你使用的库 1. 对于css,使用taiwindcss(通过CDN引入) 2. 对于代码高亮,使用prism.js 3. 图片,使用unsplash或lorem picsum API 4. 对于svg动画,优先使用anime.js 5. 对于图标,使用Font Awesome或Material Icons 6. JavaScript尽量使用原生JS,避免引入过多框架增加加载时间 # 你的输出规范 1. 所有内容都在一个html里,这意味着你的输出只是一份纯html(CSS和JS可内嵌) 2. 仔细检查自己所输出的内容是否有误,包括文本内容,代码,动效,不要输出错误的内容来误导用户 3. 确保代码在主流浏览器(Chrome、Firefox、Safari、Edge)中都能正常运行 4. 添加适当的注释以帮助用户理解关键代码部分 5. 对于复杂的交互或动画,提供简短说明 # 库的引入: <code> <!-- 引入Tailwind CSS --> <script src="https://cdn.tailwindcss.com"></script> <!-- 引入Prism.js用于代码高亮 --> <link href="https://cdn.jsdelivr.net/npm/prismjs@latest/themes/prism.min.css" rel="stylesheet" /> <!-- 引入Anime.js用于动画 --> <script src="https://cdn.jsdelivr.net/npm/animejs@latest/lib/anime.min.js"></script> <!-- 引入Font Awesome图标 --> <link href="https://cdn.jsdelivr.net/npm/font-awesome/css/font-awesome.min.css" rel="stylesheet"> </code> # 最后 输出内容直接以```html开头移动端小程序# 通用微信小程序原型生成提示词 ## 角色设定与技术要求 您是一位世界级的全栈工程师,同时精通产品规划和UI/UX设计。现在需要开发一款微信小程序,要求输出一套完整的微信小程序原型图。请严格按照以下要求执行: ### 核心技术规范 使用Tailwind CSS框架,禁止编写自定义style样式。集成Unsplash图片库获取高质量素材。确保界面无滚动条出现,保持视觉整洁。采用标准微信小程序尺寸比例(375x667像素)。所有页面统一集成在单一HTML文件中,通过mockup边框预览形式横向排列展示。**特别禁止:不得使用localStorage、sessionStorage等浏览器存储API,必须使用内存存储方案。** ### 设计系统要求 **配色方案:**采用{配色风格},避免{避免颜色},严禁使用{禁用配色}。**视觉效果:**严格控制装饰元素使用,避免过度的{视觉限制}。**图标系统:**使用手绘SVG图标,严禁使用emoji表情符号,禁用简单色块占位符。**组件多样性:**采用列表式、卡片式、表格式等多种布局形式,避免设计元素单一化。**专业度:**确保界面具备企业级产品的成熟度和专业感。**角色差异化:**根据不同用户角色设计专门的界面流程和底部导航结构。 ### 产品开发流程 **第一步:**模拟产品经理视角,基于真实用户使用场景和需求进行功能规划。**第二步:**构建完整的信息架构,包含用户角色分析、核心功能模块和页面交互流程。**第三步:**以设计师视角输出完整的UI/UX方案,注重细节处理和用户体验优化。**第四步:**验证业务闭环完整性,确保覆盖从用户获取到服务交付的全流程,避免冗余功能。 ### 微信小程序特性适配 **登录系统:**集成微信授权登录和手机号验证。**多租户支持:**通过租户ID实现数据隔离。**用户权限:**设计不同角色的功能权限管理。**原生体验:**遵循微信小程序设计规范和交互模式。**技术约束:**考虑微信小程序API限制,确保所有功能在实际环境中可实现。 ### 输出质量标准 **界面层次:**运用合理的视觉层级和信息密度。**细节精度:**确保文字排版、间距控制和对齐精确。**交互反馈:**提供状态指示、加载提示和操作确认。**业务完整性:**覆盖核心业务流程的所有关键节点。**行业深度:**深入理解目标行业的监管要求、专业标准和合规性需求。 ### 分批交付机制 采用分批确认的开发模式。每完成一批核心页面后暂停,等待确认反馈后继续后续页面开发。这种方式确保设计方向准确性并支持迭代优化。 ### 质量验收标准 最终交付的原型必须达到可直接投入开发使用的标准,包含完整的用户流程、清晰的功能逻辑和专业的视觉呈现。设计应体现对目标行业特性的深度理解,通过合适的配色、布局和交互设计营造符合业务定位的品牌形象。所有设计元素必须基于现有技术栈可实现,避免需要大量自定义开发的复杂效果。 ## 具体项目需求配置 现在需要为{行业领域}开发小程序,主要服务{用户角色列表},核心功能包括{核心功能列表},特殊要求为{特殊需求描述},行业监管要求为{合规要求},技术约束条件为{技术限制}。 ## 参考示例 基于在线教育行业的成功实践,该提示词已经过完整验证,能够生成专业级的微信小程序原型设计。通过以下关键要素实现高质量输出: **设计系统示例:**采用浅色暖色调配色方案,使用edu-blue、edu-green、edu-orange等语义化色彩变量,确保视觉一致性和专业感。 **功能模块示例:**包含用户引导流程(启动页、角色选择、首页)、核心业务模块(课程管理、作业系统、直播功能)、学习跟踪系统(进度管理、成绩统计、证书颁发)和个人中心功能。 **交互设计示例:**实现多角色底部导航差异化、状态管理和反馈机制、以及符合微信小程序规范的页面转场和组件交互。 通过明确的技术规范、设计要求和质量标准,这套提示词可以在不同行业项目中实现一致的高质量输出,确保生成的原型设计既符合行业特性又满足技术实现要求。 此提示词经过在线教育项目的完整验证,具备生成专业级微信小程序原型的能力,可适用于各行业的小程序开发需求。请注意,UI水平不允许低于示例的UI 示例代码:使用说明:将花括号内的占位符替换为具体项目需求:{配色风格} → 如"浅色暖色调"、"商务深色系"等{避免颜色} → 如"深色或过于饱和的颜色"- {禁用配色} → 如"蓝紫渐变色" (建议加上,防止AI味的UI)- {视觉限制} → 如"渐变、玻璃效果和圆角设计" (建议加上,防止AI味的UI){行业领域} → 如"医疗健康"、“金融科技”、"电商零售"等{用户角色列表} → 如"患者、医生、管理员"{核心功能列表} → 具体业务功能描述{特殊需求描述} → 行业特有需求{合规要求} → 相关法规和标准{技术限制} → 技术约束条件{cloud title="示例代码文件导入" type="default" url="/usr/uploads/custom-attachments/education_miniprogram.txt" password=""/}
 -
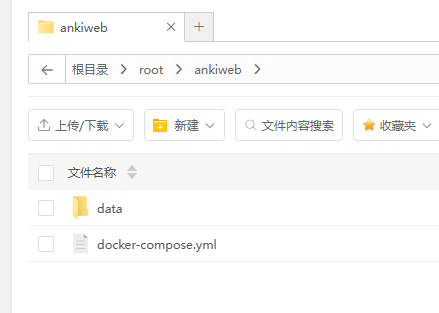
DockerCompose自建Anki服务端 services: anki-sync-server: image: johngong/anki-sync-server:latest container_name: anki-sync-server ports: - XXXX:8080 # 同步服务器地址,冒号前面请勿和本地冲突 volumes: - /root/ankiweb/data:/ankisyncdir # 冒号前面映射ankisyncdir文件夹实际路径 environment: - SYNC_USER1=admin:password # anki-sync-server同步服务器用户名及密码,建议用邮箱格式用户名,稍后会用到 - TZ=Asia/Shanghai - SYNC_BASE=/ankisyncdir # anki-sync-server同步文件位置,默认为/ankisyncdir - SYNC_PORT=8080 # anki-sync-server同步端口,默认8080 - MAX_SYNC_PAYLOAD_MEGS=100 # anki-sync-server同步服务器上传限制设置,默认100(100M大小) - UID=0 - GID=0 restart: unless-stopped需要更改ports,volumes,SYNC_USER1等几个变量引用https://zhuanlan.zhihu.com/p/1932906999001088832https://www.bt.cn/bbs/thread-141540-1-1.html
-
Claude Code 开发笔记 Claude Code 开发笔记Vsc辅助插件:代理站点推荐[1]:AgentRouter: https://agentrouter.org/register?aff=r3VD每邀请一位好友注册,您和好友将分别获得 $100 奖励通过划转功能将奖励额度转入到您的账户余额中邀请的好友越多,获得的奖励越多代理站点推荐[2]:Claude Code中国:https://code.nonocode.org/register?ref=2BXARU好友通过您的链接注册,立即获得 500 积分核心配置技术栈偏好:Next.js + TypeScript + React + Tailwind CSS v4 + shadcn/ui + SQLite文件管理文件名描述CLAUDE.md基本开发规则todo.md开发清单开发流程规范任务管理:开发前将商定任务添加到 todo.md进度跟踪:完成任务后及时标记为已完成并行开发:使用 Task 工具创建子代理,支持多任务并行对应的Prompt:在项目根目录下我创建了一个 todo 文件,每次在开发之前,你都应该先将我们商量好的代办任务添加到这个文件中。每完成一个任务时,记得把对应的任务标记为已完成,这样可以方便我们实时跟踪开发进度。 合理使用 Task 工具创建多个子代理来提高开发的效率,每一个子代理负责一个独立的任务,互不干扰,支持并行开发。高效开发命令:plan -seq -verbose --ultra-think "Rationally Spawn more than 3 agents work together to Complete the task accurately."常用命令速查命令描述claude mcp list查看安装的所有MCPclaude -c恢复上一次异常关闭的会话claude -r查看所有的历史会话claude --dangerously-skip-permissions进入狂飙模式,会自动跳过所有权限确认,不需要你手动点允许。快捷指令指令描述/memory管理当前的记忆,通过编辑器自动打开/clear清除当前的会话/compact压缩对话历史/init阅读并分析整个项目的代码/mcp查看mcp连接状态/resume查看所有的历史会话/model切换模型#记忆的内容添加记忆MCP 配置示例示例安装(默认项目生效):# Claude Code Remote Server Connection claude mcp add --transport http context7 https://mcp.context7.com/mcp --header "CONTEXT7_API_KEY: YOUR_API_KEY" # Claude Code Local Server Connection claude mcp add context7 -- npx -y @upstash/context7-mcp --api-key YOUR_API_KEY添加-s user 即对当前系统用户生效操作快捷键快捷键描述双击Esc快速清空输入框中的内容,避免长按删除键输入框为空时 输入Esc浏览所有的历史记录进行跳转 资源引用方式图片:直接粘贴,自动显示为 [Image #1]格式文件:使用 @引用当前目录文件使用 @/进行全局文件搜索输入文件名后按 Tab自动补全,默认自己也会读入当前激活的文件选中行数 claude 也会自动检测到模式切换解决方法来自于:https://linux.do/t/topic/794815/2切换模式使用 Shift + TAB 无效的话可以试试 Alt + M模式描述plan mode on (alt+m to cycle)计划模式,不执行编辑,项目初始使用,商讨好开始执行accept edits on (alt+m to cycle)自动编辑模式深度思考触发在问题描述后添加以下关键词启用深度思考模式:thinkthink hardthink harderultra think参阅1.Claude Code 用法全面拆解!26 项核心功能 + 实战技巧(建议收藏!): https://zhuanlan.zhihu.com/p/1928918331810886674
-
PHP THINKPHP6 预打印SQL public static function getPageList(array $params = array(), int $page = 1, int $limit = 10) { $where = self::getWhere($params); $model = new HolidayBenefitExclusionModel(); // $model = $model->alias('HolidayBenefitExclusionModel'); +++++++ $query = HolidayBenefitExclusionModel::buildWith($model, $params); $query = $query->where($where); return $query->order('id', 'desc') ->paginate(array( 'list_rows' => $limit, 'page' => $page, )) ->toArray(); } /** * 构建Query的With关联 * @author: LiSongKun * @date: 2025/9/11 14:23 * @param $query * @param array $params * @return mixed */ public static function buildWith($query, array $params) { return $query->with([ 'user' => function ($innerQuery) { $innerQuery->field('oa,name'); } ])->hasWhere('user', function ($innerQuery) use ($params) { $innerQuery->where(1, 1); $innerQuery->field('oa,name'); if (isset($params['name_like']) && $params['name_like'] !== '') { $innerQuery->where('name', 'like', '%' . $params['name_like'] . '%'); } }); }在使用模型查询同时调用 with 和 hasWhere 时候会遇到 :SQLSTATE[42S22]: Column not found: 1054 Unknown column 'HolidayBenefitExclusionModel.oa' in 'on clause'" 问题需要加一个别名:alias('HolidayBenefitExclusionModel')通过如下的方式可以在不执行语句的时候获取预执行的SQL输出。<?php $list = Vod::order('vod_addtime desc') ->where($where) ->fetchSql(true) // true 代表不执行语句 ->select(); dump($list);exit; ?>
-
Gemini Cli Companion的使用 最近AI编辑器势头发展的很火啊,我最开始使用的是WindSurf,由于是初始股享受了10$/mon的优惠,回来这玩意不行了经常出问题,转战到Cursor。目前使用的主力编辑器就是 Cursor, 最近它的定价策略在变动,摸索一下新的方案。试用了一下 Gemini Cli分享一下经验。Github地址: https://github.com/google-gemini/gemini-cli 可以直接通过npm全局安装:npm install -g @google/gemini-cli登录的时候选择 Google 鉴权,出现网络问题需要提前设置命令行的代理。cmd下的命令为:set http_proxy=http://127.0.0.1:7890 set httpx_proxy=http://127.0.0.1:7890由于是Cli形式的,和Cursor这种命令行的使用方式不一样,借助编辑器插件可以进行增强。然后下载一个 Vscode 或 vsc forks都支持的 Gemini CLI Companion。/ide enable进行cli与编辑器关联。增强项如下:Open Editor File Context: Gemini CLI gains awareness of the files you have open in your editor, providing it with a richer understanding of your project's structure and content.Selection Context: Gemini CLI can easily access your cursor's position and selected text within the editor, giving it valuable context directly from your current work.Native Diffing: Seamlessly view, modify, and accept code changes suggested by Gemini CLI directly within the editor.Launch Gemini CLI: Quickly start a new Gemini CLI session from the Command Palette (Cmd+Shift+P or Ctrl+Shift+P) by running the "Gemini CLI: Run" command.引用IDE 整合 Gemini Cli: https://gemini-cli.gh.miniasp.com/ide-integration.html
-
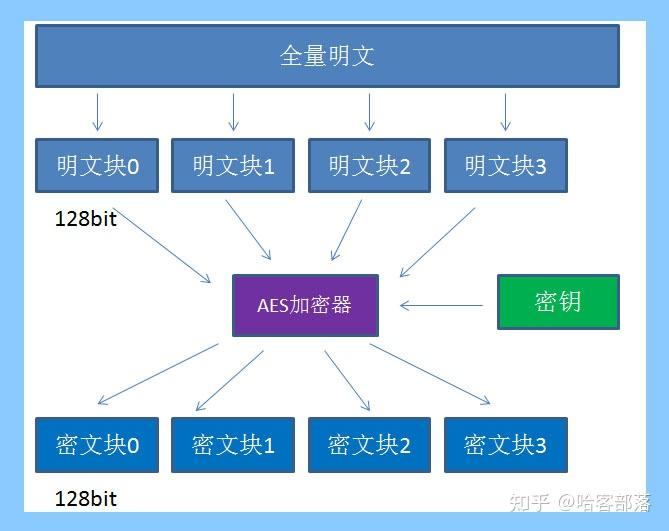
逆向加密算法盘点与实例汇总 逆向加密算法盘点与实例汇总每次都要现查例子,先进行总结一篇。单向加密MD5SHA双向加密非对称加密RSA加密RSA加密算法是一种非对称加密算法,所谓非对称,就是指该算法加密和解密使用不同的密钥,即使用加密密钥进行加密、解密密钥进行解密。在RAS算法中,加密密钥(即公开密钥)PK是公开信息,而解密密钥(即秘密密钥)SK是需要保密的。加密算法E和解密算法D也都是公开的。虽然解密密钥SK是由公开密钥PK决定的,由于无法计算出大数n的欧拉函数phi(N),所以不能根据PK计算出SK。也就是说,对极大整数做因数分解的难度决定了RSA算法的可靠性。理论上,只要其钥匙的长度n足够长,用RSA加密的信息实际上是不能被解破的。RSA算法通常是先生成一对RSA密钥,其中之一是保密密钥,由用户保存;另一个为公开密钥,可对外公开。为提高保密强度,RSA密钥至少为500位长,一般推荐使用1024位。这就使加密的计算量很大。为减少计算量,在传送信息时,常采用传统加密方法与公开密钥加密方法相结合的方式,即信息采用改进的DES或IDEA密钥加密,然后使用RSA密钥加密对话密钥和信息摘要。对方收到信息后,用不同的密钥解密并可核对信息摘要。公钥类型特性XML 格式PEM 格式外观纯文本,具有明显的 XML 标签(如 <RSAKeyValue>, <Modulus>)纯文本,具有明显的 -----BEGIN XXX----- 和 -----END XXX----- 标签编码方式通常使用 Base64 编码密钥参数(模数、指数等)通常是 Base64 编码的 DER(二进制)数据,也可以是纯二进制 DER常见扩展名.xml.pem, .key, .crt, .cer (注意:.crt/.cer 通常用于证书)标准/起源主要由 微软 .NET 生态系统使用和推广源于 OpenSSL 工具集,是互联网和 *nix 世界的事实标准包含内容非常明确地将密钥的每个组成部分(Modulus, Exponent, P, Q 等)分开存储一个封装容器,可以包含: - 私钥 - 公钥 - X.509 证书 - CSR(证书签名请求)可读性对开发者非常友好,结构清晰,易于解析和手动查看需要借助 openssl 等工具解析内容才能看清详细参数互操作性主要在 Windows/.NET 环境中流行,其他平台需要特定库解析通用性极强,被几乎所有开源库、语言和平台(如 Python, Java, Node.js, Go, PHP)广泛支持1. XML 格式这种格式将 RSA 密钥的每个数学组成部分都分解成独立的 XML 元素,并用 Base64 编码其值。公钥示例:<RSAKeyValue> <Modulus>xyz123...Abc=</Modulus> <!-- 模数 (n) --> <Exponent>AQAB</Exponent> <!-- 公钥指数 (e),通常是 65537 --> </RSAKeyValue>私钥示例 (包含更多参数):<RSAKeyValue> <Modulus>... </Modulus> <Exponent>... </Exponent> <P>... </P> <!-- 质数 p --> <Q>... </Q> <!-- 质数 q --> <DP>... </DP> <!-- d mod (p-1) --> <DQ>... </DQ> <!-- d mod (q-1) --> <InverseQ>... </InverseQ> <!-- (q^{-1} mod p) --> <D>... </D> <!-- 私钥指数 (d) --> </RSAKeyValue>特点:优点:结构清晰,可读性强,非常适合在配置文件中使用或在不同 .NET 服务间传递。缺点:在非 Windows 生态系统中不如 PEM 通用。2. PEM 格式PEM (Privacy-Enhanced Mail) 格式本质上是一个 文本化的容器,它使用 Base64 编码来包装二进制数据(通常是 DER 编码的 ASN.1 结构),并加上明确的首尾行标签。公钥示例:-----BEGIN PUBLIC KEY----- MIIBIjANBgkqhkiG9w0BAQEFAAOCAQ8A... ...(Base64 编码数据)... -----END PUBLIC KEY-----私钥示例 (PKCS#8 格式):-----BEGIN PRIVATE KEY----- MIIEvgIBADANBgkqhkiG9w0BAQEFAASCBKgw... ...(Base64 编码数据)... -----END PRIVATE KEY-----传统的 PKCS#1 私钥格式:-----BEGIN RSA PRIVATE KEY----- ...(Base64 编码数据)... -----END RSA PRIVATE KEY-----实例1.Csharp版本(.NET FRAMEWORK)仅支持XML格式的公钥,PEM格式需要先调用RSAPublicKey进行转换Main.csusing System; using Demo.Helper; namespace RSADemo { class Program { static void Main(string[] args) { // 示例:PEM格式的公钥(通常以 -----BEGIN PUBLIC KEY----- 开头) string pemPublicKey = "MIIBIjANBgkqhkiG9w0BAQEFAAOCAQ8AMIIBCgKCAQEAx4b..." + "(这里是完整的Base64编码PEM公钥内容,不包含首尾标签)"; // 1. 将PEM公钥转换为XML格式 string xmlPublicKey = RSAHelper.RSAPublicKey(pemPublicKey); Console.WriteLine("XML格式公钥:\n" + xmlPublicKey); // 2. 使用XML公钥加密数据 string plainText = "Hello, RSA加密测试!"; string encryptedText = RSAHelper.RSAEncrypt(xmlPublicKey, plainText); Console.WriteLine("\n加密结果(Base64):\n" + encryptedText); } } }RSAHelper.csusing System; using System.Collections.Generic; using System.Linq; using System.Security.Cryptography; using System.Text; using System.Threading.Tasks; using Org.BouncyCastle.Crypto.Parameters; using Org.BouncyCastle.Security; namespace Demo.Helper { /// <summary> /// RSA工具类 /// </summary> public class RSAHelper { /// <summary> /// RSA公钥pem-->XML格式转换, /// </summary> /// <param name="publicKey">pem公钥</param> /// <returns></returns> public static string RSAPublicKey(string publicKey) { RsaKeyParameters publicKeyParam = (RsaKeyParameters)PublicKeyFactory.CreateKey(Convert.FromBase64String(publicKey)); string XML = string.Format("<RSAKeyValue><Modulus>{0}</Modulus><Exponent>{1}</Exponent></RSAKeyValue>", Convert.ToBase64String(publicKeyParam.Modulus.ToByteArrayUnsigned()), Convert.ToBase64String(publicKeyParam.Exponent.ToByteArrayUnsigned())); return XML; } /// <summary> /// RSA公钥加密数据 /// </summary> /// <param name="xmlPublicKey"></param> /// <param name="content"></param> /// <returns></returns> public static string RSAEncrypt(string xmlPublicKey, string content) { string encryptedContent = string.Empty; using (RSACryptoServiceProvider rsa = new RSACryptoServiceProvider()) { rsa.FromXmlString(xmlPublicKey); byte[] encryptedData = rsa.Encrypt(Encoding.Default.GetBytes(content), false); encryptedContent = Convert.ToBase64String(encryptedData); } return encryptedContent; } } }对称加密AES加密AES是高级加密标准,在密码学中又称Rijndael加密法,是美国联邦政府采用的一种区块加密标准。这个标准用来替代原先的DES,目前已经被全世界广泛使用,同时AES已经成为对称密钥加密中最流行的算法之一。AES支持三种长度的密钥:128位,192位,256位。加密原理1.密钥密钥是AES算法实现加密和解密的根本。对称加密算法之所以对称,是因为这类算法对明文的加密和解密需要使用同一个密钥。AES支持三种长度的密钥:128位,192位,256位平时大家所说的AES128,AES192,AES256,实际上就是指的AES算法对不同长度密钥的使用。2.填充要想了解填充的概念,我们先要了解AES的分组加密特性。什么是分组加密呢?我们来看看下面这张图:AES算法在对明文加密的时候,并不是把整个明文一股脑加密成一整段密文,而是把明文拆分成一个个独立的明文块,每一个明文块长度128bit。这些明文块经过AES加密器的复杂处理,生成一个个独立的密文块,这些密文块拼接在一起,就是最终的AES加密结果。假如一段明文长度是192bit,如果按每128bit一个明文块来拆分的话,第二个明文块只有64bit,不足128bit。这时候怎么办呢?就需要对明文块进行填充(Padding)。填充涉及以下三种填充模式:NoPadding:不做任何填充,但是要求明文必须是16字节的整数倍。PKCS5Padding(默认,是PKCS#7的子集):如果明文块少于8 字节块(如 DES/3DES),在明文块末尾补足相应数量的字符,且每个字节的值等于缺少的字符数。示例:明文 {1,2,3,4,5}(5 字节),需补 3 字节 → {1,2,3,4,5,3,3,3}。PKCS#7 Padding若明文长度不是块大小的整数倍(如 AES 的 16 字节),则在末尾补 n 个字节,每个字节的值均为 n。示例:明文 {1,2,3,4,5,a,b,c,d,e}(10 字节),需补 6 字节 → {1,2,3,4,5,a,b,c,d,e,6,6,6,6,6,6}。适用于块大小为 1~255 字节的算法(如 AES 的 16/24/32 字节块)。是 PKCS#5 的通用化版本(PKCS#5 仅支持 8 字节块)。ISO10126Padding:如果明文块少于16个字节(128bit),在明文块末尾补足相应数量的字节,最后一个字符值等于缺少的字符数,其他字符填充随机数。比如明文:{1,2,3,4,5,a,b,c,d,e},缺少6个字节,则可能补全为{1,2,3,4,5,a,b,c,d,e,5,c,3,G,$,6}加密模式一、电码本模式(ECB)将整个明文分成若干段相同的小段,然后对每一小段进行加密。优点:操作简单,易于实现;分组独立,易于并行;误差不会被传送。——简单,可并行,不传送误差。缺点:掩盖不了明文结构信息,难以抵抗统计分析攻击。——可对明文进行主动攻击。二、密码分组链模式(CBC)先将明文切分成若干小段,然后每一小段与初始块或者上一段的密文段进行异或运算后,再与密钥进行加密。优点:能掩盖明文结构信息,保证相同密文可得不同明文,所以不容易主动攻击,安全性好于ECB,适合传输长度长的报文,是SSL和IPSec的标准。缺点:(1)不利于并行计算;(2)传递误差——前一个出错则后续全错;(3)第一个明文块需要与一个初始化向量IV进行抑或,初始化向量IV的选取比较复杂。初始化IV的选取方式:固定IV,计数器IV,随机IV(只能得到伪随机数,用的最多),瞬时IV(难以得到瞬时值)三、输出反馈模式(OFB)密码算法的输出(指密码key而不是密文)会反馈到密码算法的输入中,OFB模式并不是通过密码算法对明文直接加密,而是通过将明文分组和密码算法的输出进行XOR来产生密文分组。优点:隐藏了明文模式;结合了分组加密和流密码(分组密码转化为流模式);可以及时加密传送小于分组的数据。缺点:不利于并行计算;需要生成秘钥流;对明文的主动攻击是可能的。四 计数器模式(CTR)完全的流模式。将瞬时值与计数器连接起来,然后对此进行加密产生密钥流的一个密钥块,再进行XOR操作 。优点:不泄露明文;仅需实现加密函数;无需填充;可并行计算。缺点:需要瞬时值IV,难以保证IV的唯一性。五.密码反馈模式(CFB)把分组密码当做流密码使用,即密码反馈模式可将DES分组密码置换成流密码。流密码具有密文和明文长度一致、运行实时的性质,这样数据可以在比分组小得多的单元里进行加密。如果需要发送的每个字符长为8比特,就应使用8比特密钥来加密每个字符。如果长度超过8比特,则造成浪费。但是要注意,由于CFB模式中分组密码是以流密码方式使用,所以加密和解密操作完全相同,因此无法适用于公钥密码系统,只能适用于对称密钥密码系统。密码反馈模式也需要一个初始量,无须保密,但对每条消息必须有一个不同的初始量。优点:可以处理任意长度的消息,能适应用户不同数据格式的需要。可实现自同步功能。就有有限步的错误传播,除能获得保密性外,还可用于认证。缺点:对信道错误较敏感,且会造成错误传播。数据加密的速率被降低。AES算法流程AES加密算法涉及4种操作:字节替代(SubBytes)、行移位(ShiftRows)、列混淆(MixColumns)和轮密钥加(AddRoundKey)。下图给出了AES加解密的流程,从图中可以看出:1、解密算法的每一步分别对应加密算法的逆操作;2、加解密所有操作的顺序正好是相反的。正是由于这几点(再加上加密算法与解密算法每步的操作互逆)保证了算法的正确性。加解密中每轮的密钥分别由种子密钥经过密钥扩展算法得到。算法中16字节的明文、密文和轮子密钥都以一个4x4的矩阵表示。AddRoundKey (轮密钥加)— 矩阵中的每一个字节都与该次轮密钥(round key)做XOR运算;每个子密钥由密钥生成方案产生。SubBytes(字节替代) — 通过非线性的替换函数,用查找表的方式把每个字节替换成对应的字节。ShiftRows(行移位) — 将矩阵中的每个横列进行循环式移位。MixColumns (列混淆)— 为了充分混合矩阵中各个直行的操作。这个步骤使用线性转换来混合每列的四个字节。以上为AES在加密中的大致流程。DES加密
-
发现个小技巧, 本地开发配置域名不用再修改hosts了 由于 windows hosts 文件配置域名只能一个个手动配置,不支持泛解析 (没有通配符)所以每次在本地新建个站点都需要打开 hosts 文件添加一条记录尝试搜索 windows hosts 通配符 , 没有找到解决方案,却无意间找到这么个曲线救国的办法~先说结论使用 .localhost 后缀的域名比如: my-site.localhost owladmin.localhost demo.shop.localhost …为什么要用,以及为什么能用本地搭建站点,配个域名更方便访问,更方便的管理多个不同的站点docker 容器运行起来后没法动态映射端口,部分程序需要通过 nginx 反向代理才能在本机访问.localhost 后缀的域名,会默认指向本地无需写入 hosts————————————————原文作者:slowlyo转自链接:https://learnku.com/articles/86228?order_by=created_at&版权声明:著作权归作者所有。商业转载请联系作者获得授权,非商业转载请保留以上作者信息和原文链接。
-
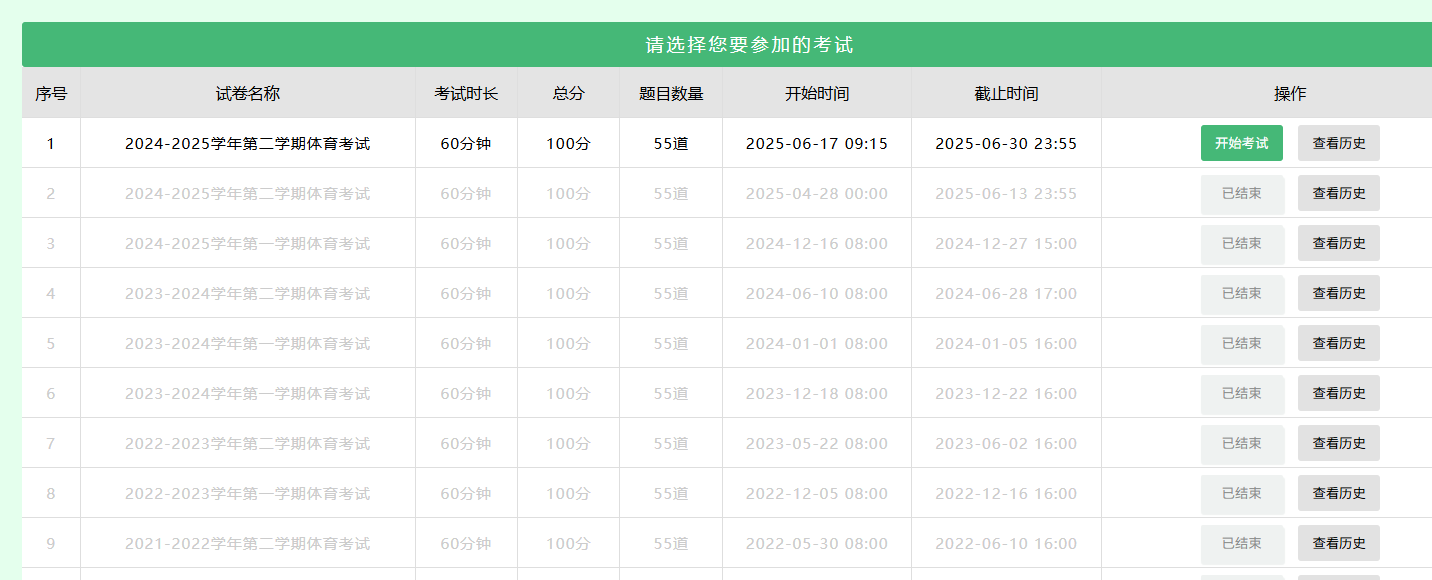
北京农学院体育理论满分请求 用法:替换Cookie和examId 发送即可满分curl --location --request POST 'http://39.107.15.49:8081/pc/web/exam/assign' \ --header 'Pragma: no-cache' \ --header 'Proxy-Connection: keep-alive' \ --header 'X-Requested-With: XMLHttpRequest' \ --header 'Cookie: SHRIOSESSIONID=' \ --header 'User-Agent: Apifox/1.0.0 (https://apifox.com)' \ --header 'Content-Type: application/x-www-form-urlencoded; charset=UTF-8' \ --header 'Accept: */*' \ --header 'Host: 39.107.15.49:8081' \ --header 'Connection: keep-alive' \ --data-urlencode 'examId=替换考试ID' \ --data-urlencode 'singleAnswer=single-1474-5129' \ --data-urlencode 'answer-1474=5129' \ --data-urlencode 'singleAnswer=single-1545-5412' \ --data-urlencode 'answer-1545=5412' \ --data-urlencode 'singleAnswer=single-1483-5164' \ --data-urlencode 'answer-1483=5164' \ --data-urlencode 'singleAnswer=single-1933-6603' \ --data-urlencode 'answer-1933=6603' \ --data-urlencode 'singleAnswer=single-1521-5318' \ --data-urlencode 'answer-1521=5318' \ --data-urlencode 'singleAnswer=single-1867-6367' \ --data-urlencode 'answer-1867=6367' \ --data-urlencode 'singleAnswer=single-1501-5238' \ --data-urlencode 'answer-1501=5238' \ --data-urlencode 'singleAnswer=single-1873-6389' \ --data-urlencode 'answer-1873=6389' \ --data-urlencode 'singleAnswer=single-1964-6721' \ --data-urlencode 'answer-1964=6721' \ --data-urlencode 'singleAnswer=single-1935-6608' \ --data-urlencode 'answer-1935=6608' \ --data-urlencode 'singleAnswer=single-1482-5162' \ --data-urlencode 'answer-1482=5162' \ --data-urlencode 'singleAnswer=single-1507-5261' \ --data-urlencode 'answer-1507=5261' \ --data-urlencode 'singleAnswer=single-1927-6581' \ --data-urlencode 'answer-1927=6581' \ --data-urlencode 'singleAnswer=single-1962-6714' \ --data-urlencode 'answer-1962=6714' \ --data-urlencode 'singleAnswer=single-1965-6723' \ --data-urlencode 'answer-1965=6723' \ --data-urlencode 'singleAnswer=single-1490-5192' \ --data-urlencode 'answer-1490=5192' \ --data-urlencode 'singleAnswer=single-1535-5372' \ --data-urlencode 'answer-1535=5372' \ --data-urlencode 'singleAnswer=single-1537-5382' \ --data-urlencode 'answer-1537=5382' \ --data-urlencode 'singleAnswer=single-1888-6443' \ --data-urlencode 'answer-1888=6443' \ --data-urlencode 'singleAnswer=single-1480-5152' \ --data-urlencode 'answer-1480=5152' \ --data-urlencode 'singleAnswer=single-1891-6452' \ --data-urlencode 'answer-1891=6452' \ --data-urlencode 'singleAnswer=single-1902-6493' \ --data-urlencode 'answer-1902=6493' \ --data-urlencode 'singleAnswer=single-1531-5356' \ --data-urlencode 'answer-1531=5356' \ --data-urlencode 'singleAnswer=single-1894-6463' \ --data-urlencode 'answer-1894=6463' \ --data-urlencode 'singleAnswer=single-1540-5391' \ --data-urlencode 'answer-1540=5391' \ --data-urlencode 'multipleAnswer=multiple-2154-16227,16225,16223,16224,16226,' \ --data-urlencode 'answer-2154=16227' \ --data-urlencode 'answer-2154=16225' \ --data-urlencode 'answer-2154=16223' \ --data-urlencode 'answer-2154=16224' \ --data-urlencode 'answer-2154=16226' \ --data-urlencode 'multipleAnswer=multiple-2081-7139,7138,7137,' \ --data-urlencode 'answer-2081=7139' \ --data-urlencode 'answer-2081=7138' \ --data-urlencode 'answer-2081=7137' \ --data-urlencode 'multipleAnswer=multiple-2101-15870,15872,15869,15873,15871,15868,' \ --data-urlencode 'answer-2101=15870' \ --data-urlencode 'answer-2101=15872' \ --data-urlencode 'answer-2101=15869' \ --data-urlencode 'answer-2101=15873' \ --data-urlencode 'answer-2101=15871' \ --data-urlencode 'answer-2101=15868' \ --data-urlencode 'multipleAnswer=multiple-2157-16288,16286,16287,16289,16290,' \ --data-urlencode 'answer-2157=16288' \ --data-urlencode 'answer-2157=16286' \ --data-urlencode 'answer-2157=16287' \ --data-urlencode 'answer-2157=16289' \ --data-urlencode 'answer-2157=16290' \ --data-urlencode 'multipleAnswer=multiple-2036-6976,6975,6977,' \ --data-urlencode 'answer-2036=6976' \ --data-urlencode 'answer-2036=6975' \ --data-urlencode 'answer-2036=6977' \ --data-urlencode 'multipleAnswer=multiple-2103-15899,15900,15898,' \ --data-urlencode 'answer-2103=15899' \ --data-urlencode 'answer-2103=15900' \ --data-urlencode 'answer-2103=15898' \ --data-urlencode 'multipleAnswer=multiple-2064-7078,7079,7077,' \ --data-urlencode 'answer-2064=7078' \ --data-urlencode 'answer-2064=7079' \ --data-urlencode 'answer-2064=7077' \ --data-urlencode 'multipleAnswer=multiple-2121-16000,15999,16001,15998,' \ --data-urlencode 'answer-2121=16000' \ --data-urlencode 'answer-2121=15999' \ --data-urlencode 'answer-2121=16001' \ --data-urlencode 'answer-2121=15998' \ --data-urlencode 'multipleAnswer=multiple-2138-16126,16128,16127,' \ --data-urlencode 'answer-2138=16126' \ --data-urlencode 'answer-2138=16128' \ --data-urlencode 'answer-2138=16127' \ --data-urlencode 'multipleAnswer=multiple-2025-15345,15348,' \ --data-urlencode 'answer-2025=15345' \ --data-urlencode 'answer-2025=15348' \ --data-urlencode 'judgeAnswer=judge-2223-7584' \ --data-urlencode 'answer-2223=7584' \ --data-urlencode 'judgeAnswer=judge-2284-7711' \ --data-urlencode 'answer-2284=7711' \ --data-urlencode 'judgeAnswer=judge-2206-7547' \ --data-urlencode 'answer-2206=7547' \ --data-urlencode 'judgeAnswer=judge-2161-7448' \ --data-urlencode 'answer-2161=7448' \ --data-urlencode 'judgeAnswer=judge-2180-7491' \ --data-urlencode 'answer-2180=7491' \ --data-urlencode 'judgeAnswer=judge-2253-7649' \ --data-urlencode 'answer-2253=7649' \ --data-urlencode 'judgeAnswer=judge-2171-7471' \ --data-urlencode 'answer-2171=7471' \ --data-urlencode 'judgeAnswer=judge-2211-7556' \ --data-urlencode 'answer-2211=7556' \ --data-urlencode 'judgeAnswer=judge-2252-7648' \ --data-urlencode 'answer-2252=7648' \ --data-urlencode 'judgeAnswer=judge-2254-7651' \ --data-urlencode 'answer-2254=7651' \ --data-urlencode 'judgeAnswer=judge-2199-7530' \ --data-urlencode 'answer-2199=7530' \ --data-urlencode 'judgeAnswer=judge-2183-7499' \ --data-urlencode 'answer-2183=7499' \ --data-urlencode 'judgeAnswer=judge-2225-7588' \ --data-urlencode 'answer-2225=7588' \ --data-urlencode 'judgeAnswer=judge-2251-7645' \ --data-urlencode 'answer-2251=7645' \ --data-urlencode 'judgeAnswer=judge-2257-7658' \ --data-urlencode 'answer-2257=7658' \ --data-urlencode 'judgeAnswer=judge-2237-7614' \ --data-urlencode 'answer-2237=7614' \ --data-urlencode 'judgeAnswer=judge-2176-7483' \ --data-urlencode 'answer-2176=7483' \ --data-urlencode 'judgeAnswer=judge-2160-7447' \ --data-urlencode 'answer-2160=7447' \ --data-urlencode 'judgeAnswer=judge-2216-7569' \ --data-urlencode 'answer-2216=7569' \ --data-urlencode 'judgeAnswer=judge-2177-7485' \ --data-urlencode 'answer-2177=7485'
-
Anaconda的Python环境使用 简述安装完 Anaconda 会自带一个Base环境, 该环境是包含 Conda 自带的 Python 和基础工具(如 pip、conda 命令)。如果直接在此环境中安装大量第三方包,可能导致:依赖冲突:不同包对同一依赖的版本要求不同(例如 numpy 的版本冲突)。环境臃肿:base 环境被污染,影响其他项目的独立性。因此,建议创建独立的环境,然后在其中安装所需的包。Conda 的包管理机制独立环境管理Conda 不仅管理 Python 包,还能管理非 Python 依赖(如 OpenSSL、C++ 库等)。每个 Conda 环境(包括 base)都有自己独立的 bin(或 Scripts)目录和 site-packages 目录。全局可执行文件(关键区别)Conda 在安装某些工具(如 mitmproxy)时,会在环境的 bin(Linux/macOS)或 Scripts(Windows)目录下生成可执行文件(如 mitmproxy.exe)。如果 Conda 的 base 环境被添加到系统 PATH 中,这些命令就可以全局调用。例如,conda install mitmproxy 会在 %CONDA_PREFIX%\Scripts\mitmproxy.exe 生成可执行文件,如果 %CONDA_PREFIX%\Scripts 在 PATH 里,就能全局运行。常用命令# Conda操作: # 1. 安装全局包时使用 conda install -c conda-forge mitmproxy # conda install # Conda 的核心命令,用于安装指定软件包。 # -c conda-forge # 指定从 conda-forge 渠道(社区维护的软件仓库)下载包。conda-forge 通常提供更新更全的软件版本。 # mitmproxy # 目标软件包名称,即交互式 HTTPS 代理工具。 # Python环境操作: # 1.创建新环境并指定环境的Python版本 conda create --name env_name python=version 例如: conda create --name python36 python=3.6 # 2.激活环境 activate env_name # 3.关闭环境 deactivate env_name # 4.删除环境 conda env remove -n env_name # 5.显示所有环境 conda env list # 6.查看anaconda中已经存在的镜像源 conda config --show channels # 7.添加镜像源(永久添加) conda config --add channels https://mirrors.tuna.tsinghua.edu.cn/anaconda/pkgs/free/ conda config --add channels https://mirrors.tuna.tsinghua.edu.cn/anaconda/pkgs/main/ conda config --add channels https://mirrors.tuna.tsinghua.edu.cn/anaconda/cloud/conda-forge/ # 8.设置搜索时显示通道地址 conda config --set show_channel_urls yes
-
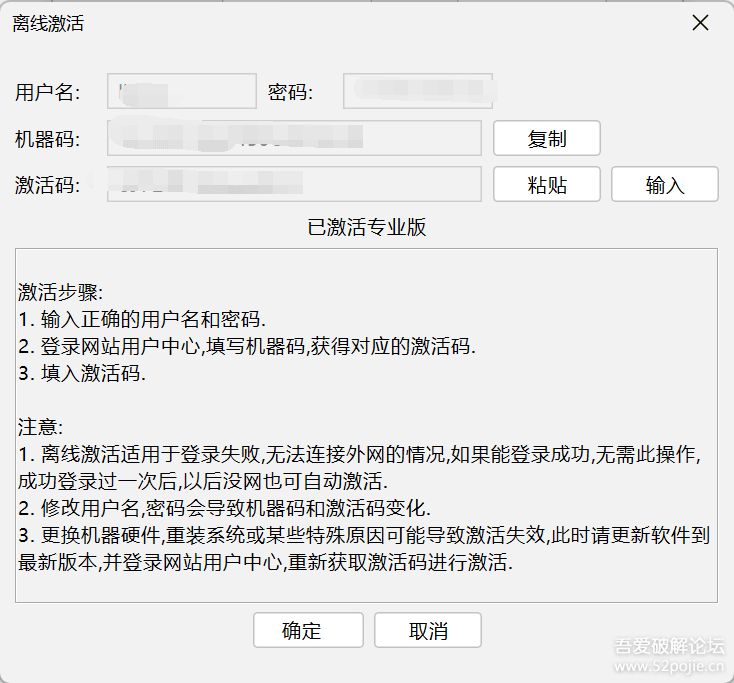
finalshell 4.5 离线码计算 破解专业版高级版 !pip install pycryptodome from Crypto.Hash import keccak from Crypto.Hash import MD5 def md5(msg): hash_obj = MD5.new(msg) return hash_obj.hexdigest() def keccak384(msg): hash_obj = keccak.new(data=msg, digest_bits=384) return hash_obj.hexdigest() if __name__ == '__main__': code = input('输入机器码: ') print('版本号 < 3.9.6 (旧版)') print('高级版:', md5(f'61305{code}8552'.encode())[8:24]) print('专业版:', md5(f'2356{code}13593'.encode())[8:24]) print('版本号 >= 3.9.6 (新版)') print('高级版:', keccak384(f'{code}hSf(78cvVlS5E'.encode())[12:28]) print('专业版:', keccak384(f'{code}FF3Go(*Xvbb5s2'.encode())[12:28]) print('版本号 (4.5)') print('高级版:', keccak384(f'{code}wcegS3gzA$'.encode())[12:28]) print('专业版:', keccak384(f'{code}b(xxkHn%z);x'.encode())[12:28])我直接在Colab中运行的,激活成功了